
How to use BatchIMEI
From an Excel input file to activation and warranty results in a few simple steps.
Step 1: Log in
Go to BatchIMEI.com and select Log in. New users can register and verify their email to receive 5 free checks.
Step 2: Prepare your Excel file
Create an .xlsx, .xls or .csv file. Name the first column imei or serial, with one device per row.
- IMEIs and serials can be mixed in one file.
- Duplicate values are removed automatically.
- Each file supports up to 1,000 devices.
imei
CDVHV2FJLG
F3CFVP7N36
MN6D6JTQPX
Step 3: Upload and run
On the main screen, find Import Excel, select your file and start the check. Live progress shows completed, pending and failed rows.

For up to 5 devices, paste IMEIs or serials directly into the quick-check box instead.
Step 4: Read the results
The result table includes the identifier, model, activation date, warranty days remaining and activation status.
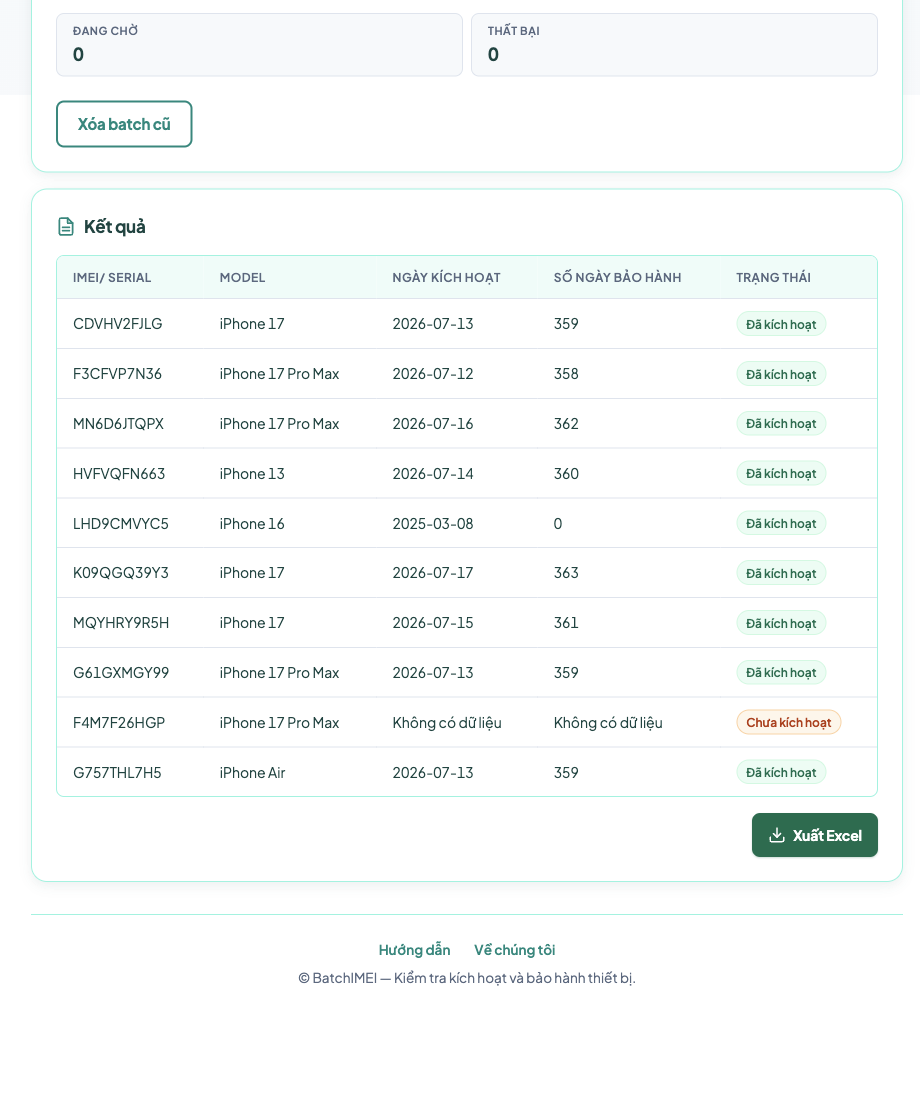
Step 5: Export Excel
Select Export Excel below the result table to download the complete output. Select Clear old batch before starting a new list.
Usage tips
- Recheck the identifier when a row has no data.
- Keep the tab open while a batch is running.
- Each successful device check uses 1 token.
- Check close to transaction time for current information.
Frequently asked questions
Which columns are required?
Only one column named imei or serial is required, with one device per row.
How many devices can I check at once?
Excel upload supports up to 1,000 devices; quick check supports up to 5.
Can I download the results?
Yes. Select Export Excel after the batch is complete.
Ready to check your devices?